Vincent
Member
- Joined
- Oct 16, 2024
- Messages
- 137
- Reaction score
- 16
- Rivian
- R1T
A couple of days back, I helped a friend to install his Rivian Wall Charger and this is just an article with regards to the installation process for anyone who might be interested to learn about it.
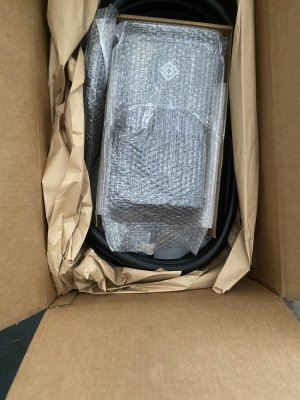
So he had a 240v 30A breaker in the garage for wood working which was a 5-20R outlet and I wanted to change it to a 14-50R so he can use the Rivian Portable Charger and install a 14-50P pigtail on the Rivian Wall Charger. Always play it safe, if you are not comfortable with electrical work please hire a professional.
So we used an old 6AWG extension cable I had from welding that I repurposed for this project. It is a 4 wire (2 hot, neutral, and a ground wire). All 4 wires are used for a 14-50P but you do not use the neutral in the actual wall charger.
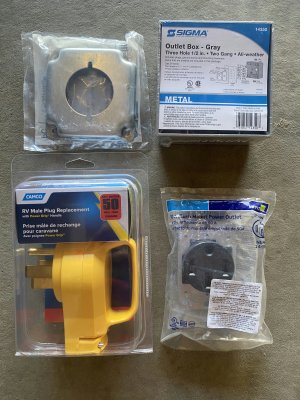
For the 14-50P is used an RV replacement as it has a nice handle on the back.

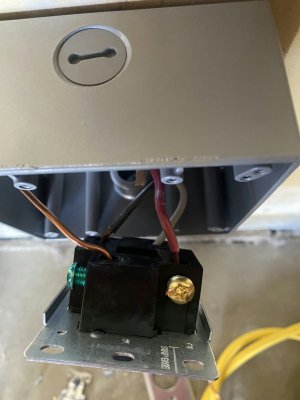
Back view of the 14-50R - Green =Ground, Silver = Neutral, Gold = your hot wires (Red & Black). Be sure to have your power turned off. If you are unsure of the breaker flip the main breaker to be safe.
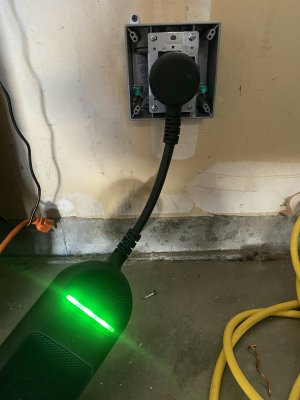
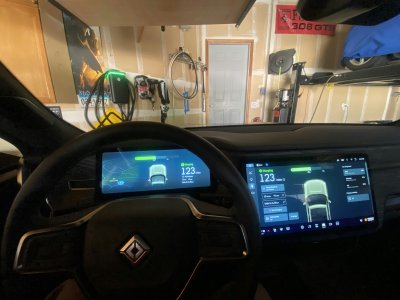
Power turned back on and testing with the portable charger with the 14-50P adaptor installed. Green light means good and his R1T is now charging. Now time to pigtail and install the Rivian Wall Charger.
Time to install and wire the charger. will find a location and mount the back plate to a wall stud first.
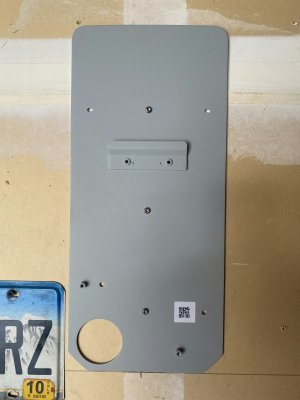
Back Mounting plate installed with 3 of the provided screws.
2 torx 20 security screws are removed and the face panel is slide off. You will also need to knock out the wire outlet in the bottom of the charger to pass the pigtail through. You will mount the charger onto the backer plate and then use two screws to security the charger to the plate.
This is the terminal block that you will strip and install the pigtail cable.
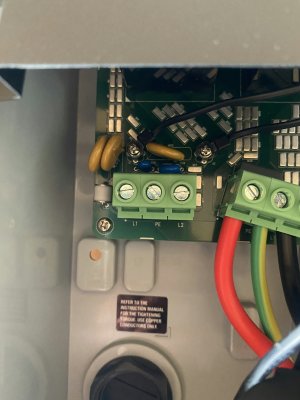
Wires inserted and screws are tightened for a solid connection.
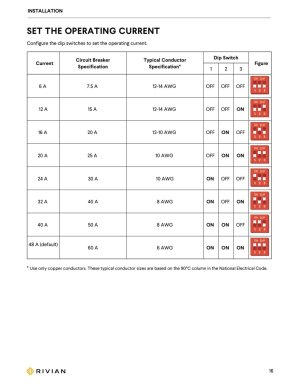
Set the dip switches according to your breaker size (picture shows default dip switch position from factory be sure to change based on circuit size).
I changed his dip switches to the 30A circuit setting. Use chart below to set according to your circuit size.
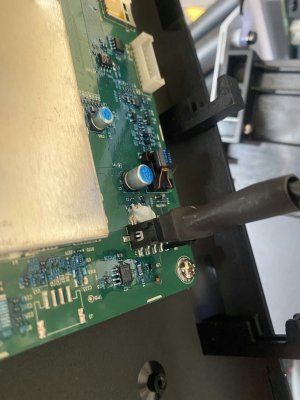
Time to plug the 14-50P into the wall outlet and check the wires for power with a power meter. Once the power is confirmed time to put the front panel on. Below is the rear of the panel, locate the black plug at the lower right.
Don’t forget to secure the front panel with the 2 torx 20 screws you removed at the beginning. Now time to install the wall charger on the Rivian App… click add product.
Link your WiFi network and then plug your wall charger into your Rivian. Just like that and your charging setup is all set and ready to go.

So he had a 240v 30A breaker in the garage for wood working which was a 5-20R outlet and I wanted to change it to a 14-50R so he can use the Rivian Portable Charger and install a 14-50P pigtail on the Rivian Wall Charger. Always play it safe, if you are not comfortable with electrical work please hire a professional.
So we used an old 6AWG extension cable I had from welding that I repurposed for this project. It is a 4 wire (2 hot, neutral, and a ground wire). All 4 wires are used for a 14-50P but you do not use the neutral in the actual wall charger.

For the 14-50P is used an RV replacement as it has a nice handle on the back.

Back view of the 14-50R - Green =Ground, Silver = Neutral, Gold = your hot wires (Red & Black). Be sure to have your power turned off. If you are unsure of the breaker flip the main breaker to be safe.


Power turned back on and testing with the portable charger with the 14-50P adaptor installed. Green light means good and his R1T is now charging. Now time to pigtail and install the Rivian Wall Charger.
Time to install and wire the charger. will find a location and mount the back plate to a wall stud first.

Back Mounting plate installed with 3 of the provided screws.
2 torx 20 security screws are removed and the face panel is slide off. You will also need to knock out the wire outlet in the bottom of the charger to pass the pigtail through. You will mount the charger onto the backer plate and then use two screws to security the charger to the plate.
This is the terminal block that you will strip and install the pigtail cable.

Wires inserted and screws are tightened for a solid connection.
Set the dip switches according to your breaker size (picture shows default dip switch position from factory be sure to change based on circuit size).
I changed his dip switches to the 30A circuit setting. Use chart below to set according to your circuit size.

Time to plug the 14-50P into the wall outlet and check the wires for power with a power meter. Once the power is confirmed time to put the front panel on. Below is the rear of the panel, locate the black plug at the lower right.

Don’t forget to secure the front panel with the 2 torx 20 screws you removed at the beginning. Now time to install the wall charger on the Rivian App… click add product.
Link your WiFi network and then plug your wall charger into your Rivian. Just like that and your charging setup is all set and ready to go.

Last edited:

