Morgan
New member
- Joined
- Dec 18, 2024
- Messages
- 14
- Reaction score
- 2
- IG Page
- Visit Instagram
- Rivian
- 2023, Rivian R1T, white & Blue
This past Thursday, December 12th 2024, my Rivian R1T in Rivian Blue arrived. was supposed to deliver my wall charger the same day, but it ended up coming Friday the 8th instead, which was yesterday as of the writing of this article. Yesterday and today my son and I wired and installed the charger and got it on our home Wi-Fi network.
This article is about what worked in my house and follows all applicable electrical rules in our area. YMMV as to whether the same rules pertain to your local situation. With that said, I hope everyone can get some good information from this article.
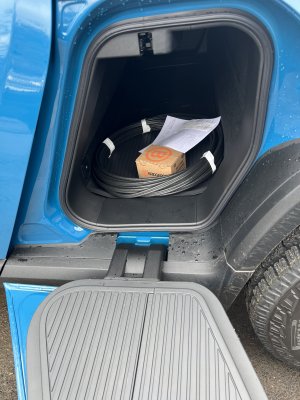
My first step was to pick up 55' of 6-2 wiring as well as a 60 AMP GE breaker as well as some large wiring staples and metal 3/4" knockout clamps. The gear tunnel makes a great place to store stuff that might get the inside of our Rivian's dirty.
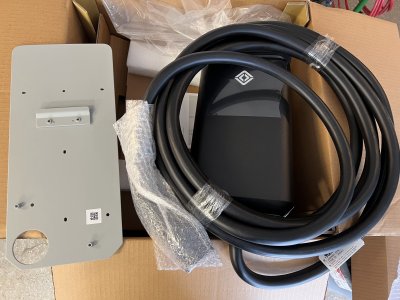
When the charger arrived, it came in a non descript box. inside is the charger, a bag of fasteners, the wall plate and instructions.
The first step was to install the wall plate. My garage is in the basement of our house and the front wall of the garage adjoins the basement. Luckily our basement is not finished, but the walls and ceiling of the garage are.
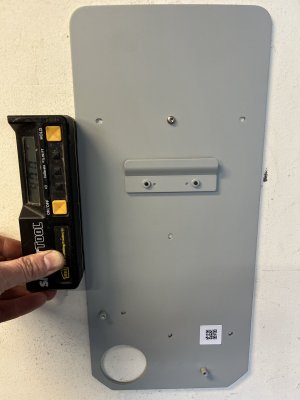
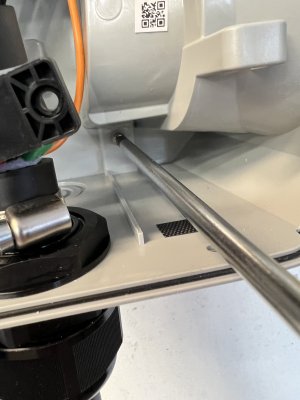
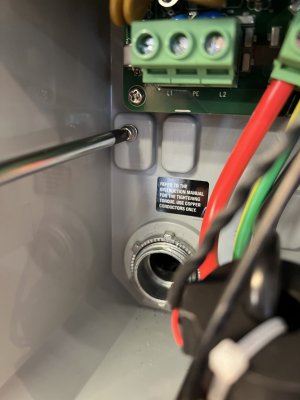
I installed the wall plate on a stud, plumbed it and used the provided 1.5" long safety torx screws that were provided. The picture shows the top screw installed, but I also used the other two screw holes that go down the middle of the plate.
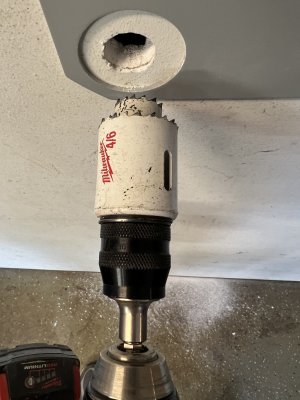
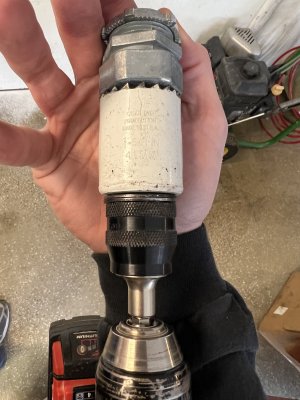
I initially drilled a 1" hole through the sheetrock in the center of the lower left hole in the plate but then realized I needed a 1-5/8ths hole to clear the wire conduit clamp I installed on the back of the charger. I used the dual hole saw bit arbor shown below to open the 1" hole up to 1-5/8th. the smaller 1" hole saw kept the larger hole saw centered while opening up the sheetrock.
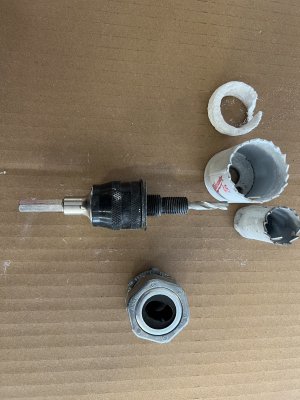
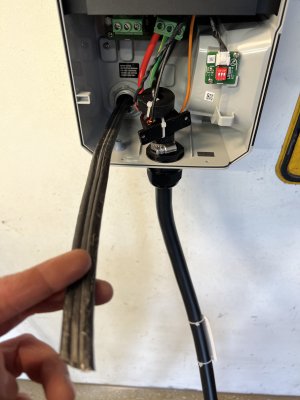
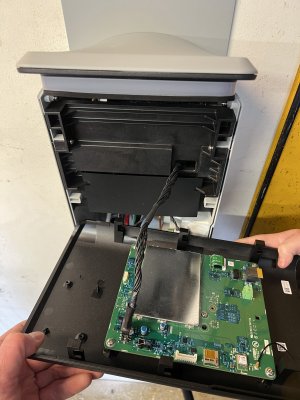
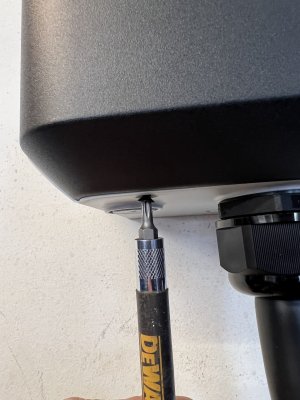
As shown in the bottom of the picture above, I found a rubber insert wiring conduit clamp that has just the right size oval opening for the 6-2 Romex.I tightened this down to the hole in the back of the Rivian Charger. First the plastic charger case has to be opened by unscrewing the two black safety torx screws on the bottom of the face of the charger. Then the front and back of the charger can separate as shown below.
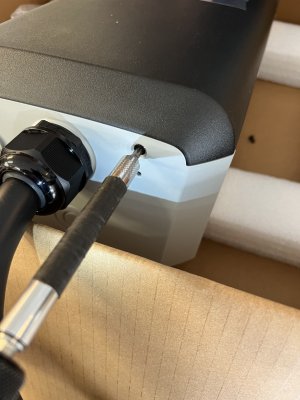
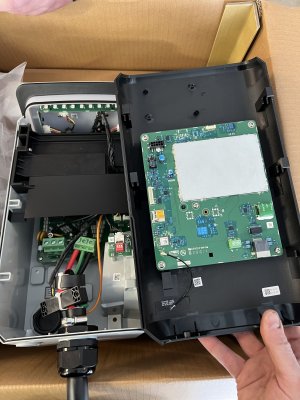
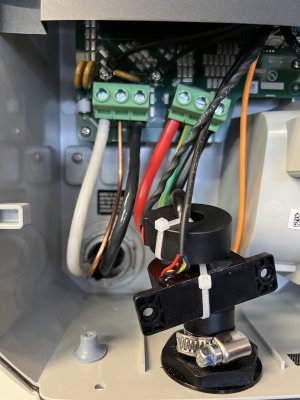
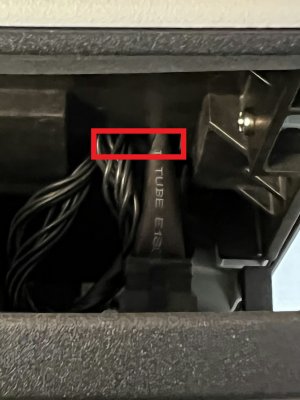
The black plug in the lower left corner of the charge needs to be removed to install the watertight wire conduit clamp. The plug can be unscrewed from the back with a flat head screwdriver but the nut on the inside of the charger also needs to be held to keep it from spinning.
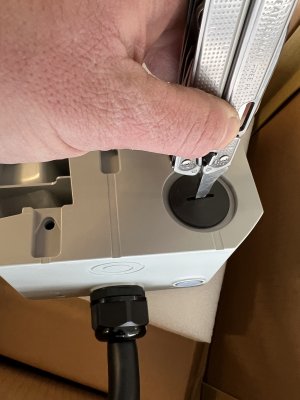
Then the conduit clamp can be installed with a 1" EMT conduit nut onto the back of the charger.
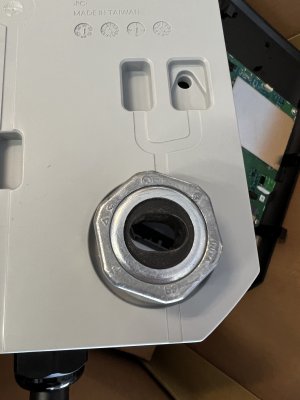
The plastic body of the wall charger then installs by clipping onto the metal lip in the wall plate and then the bottom of the charger is screwed in with two small screws into the bottom of the metal plate.
Continue from my next trend: as I can't attach more than 10 files
This article is about what worked in my house and follows all applicable electrical rules in our area. YMMV as to whether the same rules pertain to your local situation. With that said, I hope everyone can get some good information from this article.
My first step was to pick up 55' of 6-2 wiring as well as a 60 AMP GE breaker as well as some large wiring staples and metal 3/4" knockout clamps. The gear tunnel makes a great place to store stuff that might get the inside of our Rivian's dirty.

When the charger arrived, it came in a non descript box. inside is the charger, a bag of fasteners, the wall plate and instructions.

The first step was to install the wall plate. My garage is in the basement of our house and the front wall of the garage adjoins the basement. Luckily our basement is not finished, but the walls and ceiling of the garage are.

I installed the wall plate on a stud, plumbed it and used the provided 1.5" long safety torx screws that were provided. The picture shows the top screw installed, but I also used the other two screw holes that go down the middle of the plate.
I initially drilled a 1" hole through the sheetrock in the center of the lower left hole in the plate but then realized I needed a 1-5/8ths hole to clear the wire conduit clamp I installed on the back of the charger. I used the dual hole saw bit arbor shown below to open the 1" hole up to 1-5/8th. the smaller 1" hole saw kept the larger hole saw centered while opening up the sheetrock.


As shown in the bottom of the picture above, I found a rubber insert wiring conduit clamp that has just the right size oval opening for the 6-2 Romex.I tightened this down to the hole in the back of the Rivian Charger. First the plastic charger case has to be opened by unscrewing the two black safety torx screws on the bottom of the face of the charger. Then the front and back of the charger can separate as shown below.


The black plug in the lower left corner of the charge needs to be removed to install the watertight wire conduit clamp. The plug can be unscrewed from the back with a flat head screwdriver but the nut on the inside of the charger also needs to be held to keep it from spinning.

Then the conduit clamp can be installed with a 1" EMT conduit nut onto the back of the charger.

The plastic body of the wall charger then installs by clipping onto the metal lip in the wall plate and then the bottom of the charger is screwed in with two small screws into the bottom of the metal plate.
Continue from my next trend: as I can't attach more than 10 files
Last edited by a moderator:

