Vincent
Member
- Joined
- Oct 16, 2024
- Messages
- 137
- Reaction score
- 16
- Rivian
- R1T
As part of the job of applying PPF to my R1T, I wanted to remove the lower door trim pieces to make it easier to apply the film as well as ensure the edge of the film is well below the edge of the trim.
Fair warning: removing the trim looks straight forward in the pictures below but it is major pain in the you-know-what to remove!
To start, remove the plastic strip on the interior. There are tab clips on both top and bottom. I found it was easiest to pull all the middle clips lose first an then work on the ones on the end which seem to not want to let go.
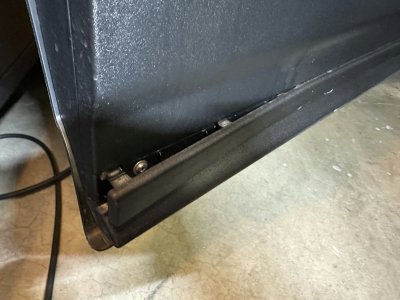
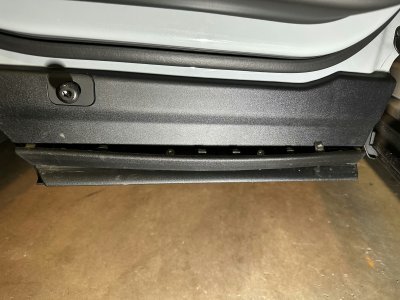
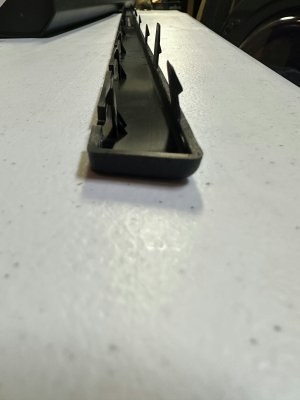
Once the plastic strip is removed, it will expose 7 (4 on the back doors) T-20 screws that are easily removed. And that is the end of the easy part of this tutorial...
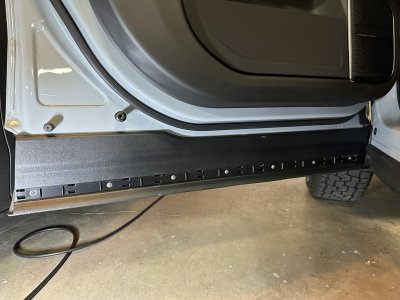
The next step is to get the exterior trim piece off. I would suggest not trying to pry at it from the top as the clips are very hard to break loose and you will likely damage your door or the paint.
The only way to get at the clips is from the bottom. There are two rows of clips. Bottom are highlighted in blue and the top in green:
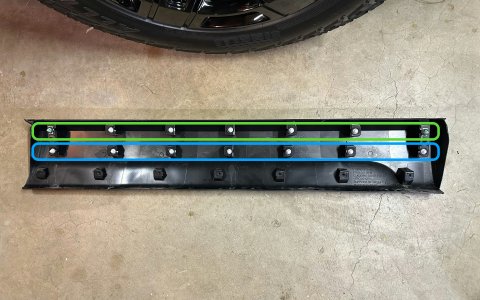
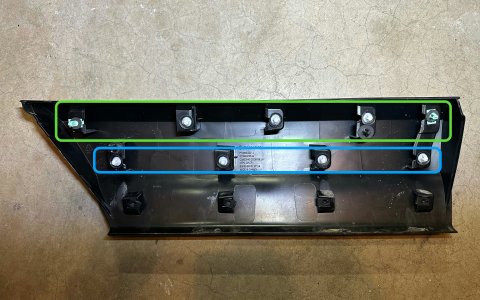
I had to lay on the ground and pry the exterior and interior trim pieces apart (probably only about 1/2 inch is all you'll get) to see up in there. You will barely be able to see the bottom clips. I used a clip removal prybar to pop them loose. This allows the exterior trim piece to be pulled further outwards exposing the top clips. Repeat the process to pop the top clips loose. The outer two clips on the top row are green vs the other white clips and gave me more trouble than the others.

I did not need to remove the interior trim piece for PPF so I unfortunately don't have step by step instructions for that. In the image above, you can see the interior trim wraps around the bottom of the door with a little C channel. It appears that the trim will need to be removed from the interior side first and then slid off the bottom of the door.
Putting the exterior trim piece back on is extremely simple since it just snaps back on with a little elbow grease.
At least knowing what is behind there is half the battle. I was able to remove the passenger side about twice as quickly as the drivers side once I knew how to approach it. I did however skin my knuckle pretty good fighting with keeping the two trim pieces separated to get my prybar on the bottom clips so be warned!
Fair warning: removing the trim looks straight forward in the pictures below but it is major pain in the you-know-what to remove!
To start, remove the plastic strip on the interior. There are tab clips on both top and bottom. I found it was easiest to pull all the middle clips lose first an then work on the ones on the end which seem to not want to let go.


Once the plastic strip is removed, it will expose 7 (4 on the back doors) T-20 screws that are easily removed. And that is the end of the easy part of this tutorial...

The next step is to get the exterior trim piece off. I would suggest not trying to pry at it from the top as the clips are very hard to break loose and you will likely damage your door or the paint.
The only way to get at the clips is from the bottom. There are two rows of clips. Bottom are highlighted in blue and the top in green:


I had to lay on the ground and pry the exterior and interior trim pieces apart (probably only about 1/2 inch is all you'll get) to see up in there. You will barely be able to see the bottom clips. I used a clip removal prybar to pop them loose. This allows the exterior trim piece to be pulled further outwards exposing the top clips. Repeat the process to pop the top clips loose. The outer two clips on the top row are green vs the other white clips and gave me more trouble than the others.

I did not need to remove the interior trim piece for PPF so I unfortunately don't have step by step instructions for that. In the image above, you can see the interior trim wraps around the bottom of the door with a little C channel. It appears that the trim will need to be removed from the interior side first and then slid off the bottom of the door.
Putting the exterior trim piece back on is extremely simple since it just snaps back on with a little elbow grease.
At least knowing what is behind there is half the battle. I was able to remove the passenger side about twice as quickly as the drivers side once I knew how to approach it. I did however skin my knuckle pretty good fighting with keeping the two trim pieces separated to get my prybar on the bottom clips so be warned!


