Morgan
New member
- Joined
- Dec 18, 2024
- Messages
- 14
- Reaction score
- 2
- IG Page
- Visit Instagram
- Rivian
- 2023, Rivian R1T, white & Blue
I recently set up version 2.0 of the Megawatt rock sliders. Using hand tools and taking my time to do it correctly, I finished the installation in a couple of hours. I was able to install the newly designed slider more quickly and with a bounce thanks to my friend for a helping hand. if you may know, Electruck4x4, the company that makes Megawatt rock sliders. As everyone is aware, Rivian modified the R1T's underside, and the bolt positions on more recent models differ. (Some of the mounting points found on the 2022 R1Ts are absent from the most recent models.) The way the sliders mounted to the R1T had to be redesigned as a result.
My spare tire and rock sliders arrived last week; it's been almost Christmas recently. The T55 torx bit required for the installation and a small thread locking tube were included with the sliders, and the installation instructions on Electruck4x4.com were simple to follow. The truck's stock hardware was used for the installation, thus no more bolts were required.
The following items are part of the Megawatt Rocks silder: two rock sliders One thread locker with a TP55 socket.
The following tools are needed to install the Megawatt Rocks silde: A five-gallon bucket, jack stands, or a floor jack Pick or screwdriver to release body panel clips Torx screwdriver T15 A ratchet TP55 socket 10 mm socket 17 mm socket Extension of sockets wrench with torque.
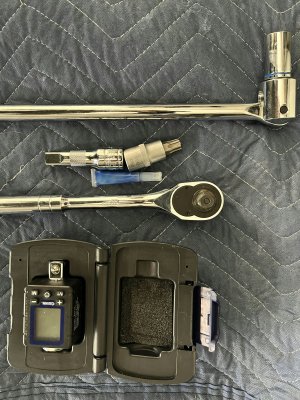
Therefore, i start by parking the car on a level place so that i can make use a jack to raise it. To get that down, it took a minute or two. I then began by following the directions to remove and loosen the factory bolts.
I was able to take out the 10mm bolt on the plastic panel beneath the car and in front of the back wheel by using a socket extension. It was difficult to execute (laughing).
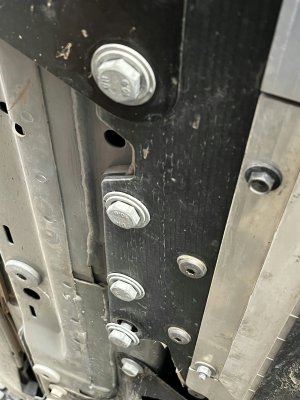
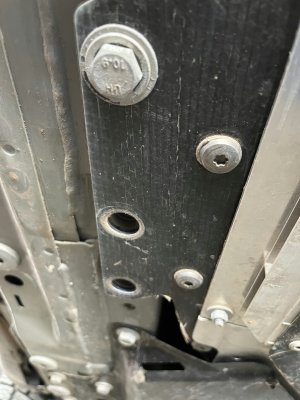
Eliminating the plastics directly beneath the car was the next crucial element. By doing this, the seven 17mm bolts holding the plastic underbody cover or underbody shield are exposed. I was able to remove bolts 1, 2, 6, 7, 10, and 11 starting from the front.
then went to take out the big TP55 bolts. beginning at the front. Torx heads are quite simple to remove. Therefore, if you're doing it alone, I would suggest that you exercise caution.I turned the bolt head while applying inward pressure with a breaker bar.
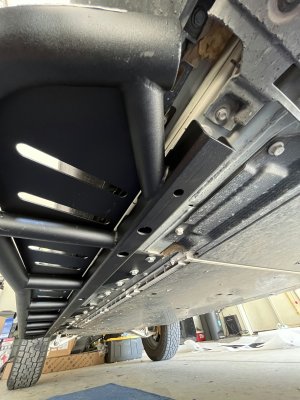
In order for everything to line up properly, the slider must then clear a tiny bolt head close to the front of the car. To do this, you must loosen the torque bolts as much as you can.This method was a little stressful, but I had no issues with the first side. However, I had trouble aligning things when I installed the slider on the truck's passenger side, and I found that I needed to loosen the Torx bolts a bit further to make room for the bolt head. After aligning everything, I tested the six bolts I had taken out, put some thread locker, and began tightening everything.
This section took the longest to complete because I took my time going back and forth between the bolts as I tightened. After everything was tight, I alternated between bolts and torqued them to the specifications stated in the instructions. The middle two 17mm bolts that I took out and put back in the slider bracket were the only thing that gave me trouble during the installation. These bolts were more difficult to remove and replace on both sides. To avoid breaking a bolt, I had to take my time and utilize my breaker bar for greater leverage.
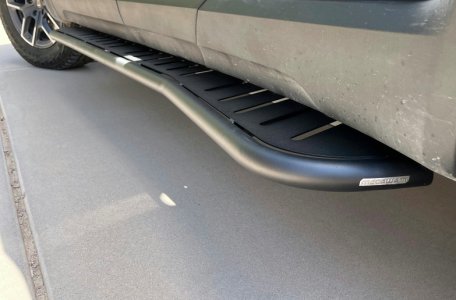
I'm happy I could contribute in any way to Brenton M's successful launch of a fantastic product!
My spare tire and rock sliders arrived last week; it's been almost Christmas recently. The T55 torx bit required for the installation and a small thread locking tube were included with the sliders, and the installation instructions on Electruck4x4.com were simple to follow. The truck's stock hardware was used for the installation, thus no more bolts were required.
The following items are part of the Megawatt Rocks silder: two rock sliders One thread locker with a TP55 socket.
The following tools are needed to install the Megawatt Rocks silde: A five-gallon bucket, jack stands, or a floor jack Pick or screwdriver to release body panel clips Torx screwdriver T15 A ratchet TP55 socket 10 mm socket 17 mm socket Extension of sockets wrench with torque.

Therefore, i start by parking the car on a level place so that i can make use a jack to raise it. To get that down, it took a minute or two. I then began by following the directions to remove and loosen the factory bolts.
I was able to take out the 10mm bolt on the plastic panel beneath the car and in front of the back wheel by using a socket extension. It was difficult to execute (laughing).


Eliminating the plastics directly beneath the car was the next crucial element. By doing this, the seven 17mm bolts holding the plastic underbody cover or underbody shield are exposed. I was able to remove bolts 1, 2, 6, 7, 10, and 11 starting from the front.
then went to take out the big TP55 bolts. beginning at the front. Torx heads are quite simple to remove. Therefore, if you're doing it alone, I would suggest that you exercise caution.I turned the bolt head while applying inward pressure with a breaker bar.

In order for everything to line up properly, the slider must then clear a tiny bolt head close to the front of the car. To do this, you must loosen the torque bolts as much as you can.This method was a little stressful, but I had no issues with the first side. However, I had trouble aligning things when I installed the slider on the truck's passenger side, and I found that I needed to loosen the Torx bolts a bit further to make room for the bolt head. After aligning everything, I tested the six bolts I had taken out, put some thread locker, and began tightening everything.
This section took the longest to complete because I took my time going back and forth between the bolts as I tightened. After everything was tight, I alternated between bolts and torqued them to the specifications stated in the instructions. The middle two 17mm bolts that I took out and put back in the slider bracket were the only thing that gave me trouble during the installation. These bolts were more difficult to remove and replace on both sides. To avoid breaking a bolt, I had to take my time and utilize my breaker bar for greater leverage.

I'm happy I could contribute in any way to Brenton M's successful launch of a fantastic product!
Last edited by a moderator:

