Vincent
Active Wheeler
- Joined
- Oct 16, 2024
- Messages
- 244
- Reaction score
- 26
- Rivian
- R1T
I was happy to have the Running Boards installed by TSportline this week. Guys were great! They did one install in the morning, which was the first they had done, but looked liked seasoned pro's installing mine. One hour and five minutes from start to finish.
I was originally thinking I wanted to slat/slot the plastic panels for a cleaner look, but then realized how much easier it is to install them with the 4" hole instead and opted for that route. With the 4" holes, you don't have to remove the plastic panels at all. Plus, they indicated that removing the clips can be a gamble.
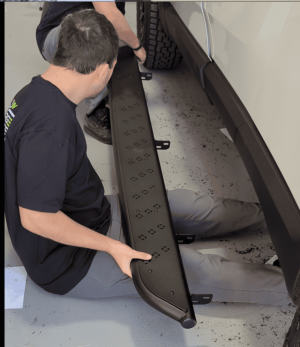
No matter how careful you are, they can still get damaged just by popping them out. They're made to push in, not pull out. While it can be done, you run the risk of the clips not grabbing as tightly and could rattle around or even come off if enough of them get damaged. Probably saved at least 30 minutes of install time as well. Can't see the 4" inch holes with the boards on the truck unless you get on the floor.
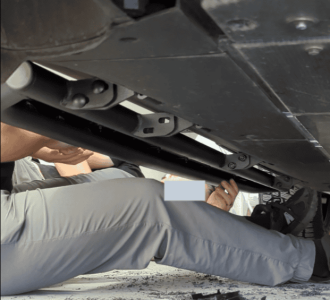
They took my truck to shoot photos of it, but will share a few that I took as an appetizer. As they've stated all along, they are a pretty simple install.
1. Unbox - (about 10 minutes)
2. Mount the tread plates - 14 nuts and bolts per side. Two guys worked on it up until this point. (about 10 minutes)
Just one person handled the next two steps.....
3. Drill 4" holes (4 per side) (About 16 minutes, including printing out templates to know where to drill the holes)
4. Mount the four mounting brackets to the truck by removing a single bolt, then use the same bolt to install the brackets (about 8 minutes)
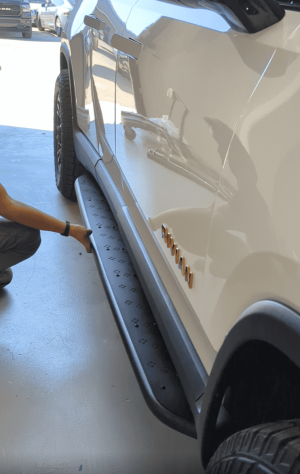
Second person returned for last steps....
5. Mount boards to newly installed brackets (one person could do it, but easier with two to hold it in place to get the 8 nuts and bolts started (per side). (About 10 minutes)
6. Adjust depth of running boards. Have about 1/2 inch of play to slide them in or out. I originally chose all the way out since I have custom wheels / tires that stick out further, but that left a little bit of gap between the board and the truck. So, slid them all the way in to mostly eliminate the gap. Could hardly tell any difference in terms of how far the step sticks out. Still more than enough step space with them all the way in. (About 5 minutes)
7. Tighten everything down and done. (about 4 minutes).
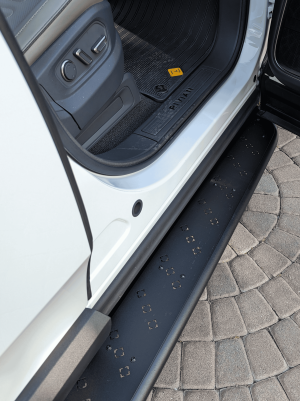
My guess is they can probably shave 15 minutes off this time as they perfect their process, but was quite impressed with how quickly they got them done. I'm very happy with them. A mental adjustment of how to enter and exit the truck after almost 2 years of doing it one way. This way is definitely better, but will be a little awkward until I get used to it.
Didn't notice any wind noise but may discover things as time progresses. As of now, very pleased to have these on the truck.
I was originally thinking I wanted to slat/slot the plastic panels for a cleaner look, but then realized how much easier it is to install them with the 4" hole instead and opted for that route. With the 4" holes, you don't have to remove the plastic panels at all. Plus, they indicated that removing the clips can be a gamble.

No matter how careful you are, they can still get damaged just by popping them out. They're made to push in, not pull out. While it can be done, you run the risk of the clips not grabbing as tightly and could rattle around or even come off if enough of them get damaged. Probably saved at least 30 minutes of install time as well. Can't see the 4" inch holes with the boards on the truck unless you get on the floor.

They took my truck to shoot photos of it, but will share a few that I took as an appetizer. As they've stated all along, they are a pretty simple install.
1. Unbox - (about 10 minutes)
2. Mount the tread plates - 14 nuts and bolts per side. Two guys worked on it up until this point. (about 10 minutes)
Just one person handled the next two steps.....
3. Drill 4" holes (4 per side) (About 16 minutes, including printing out templates to know where to drill the holes)
4. Mount the four mounting brackets to the truck by removing a single bolt, then use the same bolt to install the brackets (about 8 minutes)

Second person returned for last steps....
5. Mount boards to newly installed brackets (one person could do it, but easier with two to hold it in place to get the 8 nuts and bolts started (per side). (About 10 minutes)
6. Adjust depth of running boards. Have about 1/2 inch of play to slide them in or out. I originally chose all the way out since I have custom wheels / tires that stick out further, but that left a little bit of gap between the board and the truck. So, slid them all the way in to mostly eliminate the gap. Could hardly tell any difference in terms of how far the step sticks out. Still more than enough step space with them all the way in. (About 5 minutes)
7. Tighten everything down and done. (about 4 minutes).

My guess is they can probably shave 15 minutes off this time as they perfect their process, but was quite impressed with how quickly they got them done. I'm very happy with them. A mental adjustment of how to enter and exit the truck after almost 2 years of doing it one way. This way is definitely better, but will be a little awkward until I get used to it.
Didn't notice any wind noise but may discover things as time progresses. As of now, very pleased to have these on the truck.


